2 Ways to Clean Your Keycaps and Keyboard: A Complete Guide
Resources
May 10 2023
Keeping your keyboard and keycaps clean is key to ensuring they have a long, happy life. Good keyboard hygiene helps your device last longer (just like with any electronic device), but it also helps preserve the texture of the keycaps. Moreover, keeping your board in pristine condition maintains optimal tactility since no grime will be polluting the switches or PCB. Therefore, it's essential to keep your keyboard clean, and in this article, we'll discuss two ways to clean your keyboard and keycaps.
Keyboard Cleaning Best Practices
Before jumping into the cleaning process, there are a few best practices to follow. Here’s a short and simple list of things to keep in mind when you are cleaning:
1. Clean your board on a flat surface with ample space.
2. Power off your board to prevent any accidental damage while cleaning it.
Method 1: How to Clean Keycaps without Removing Them
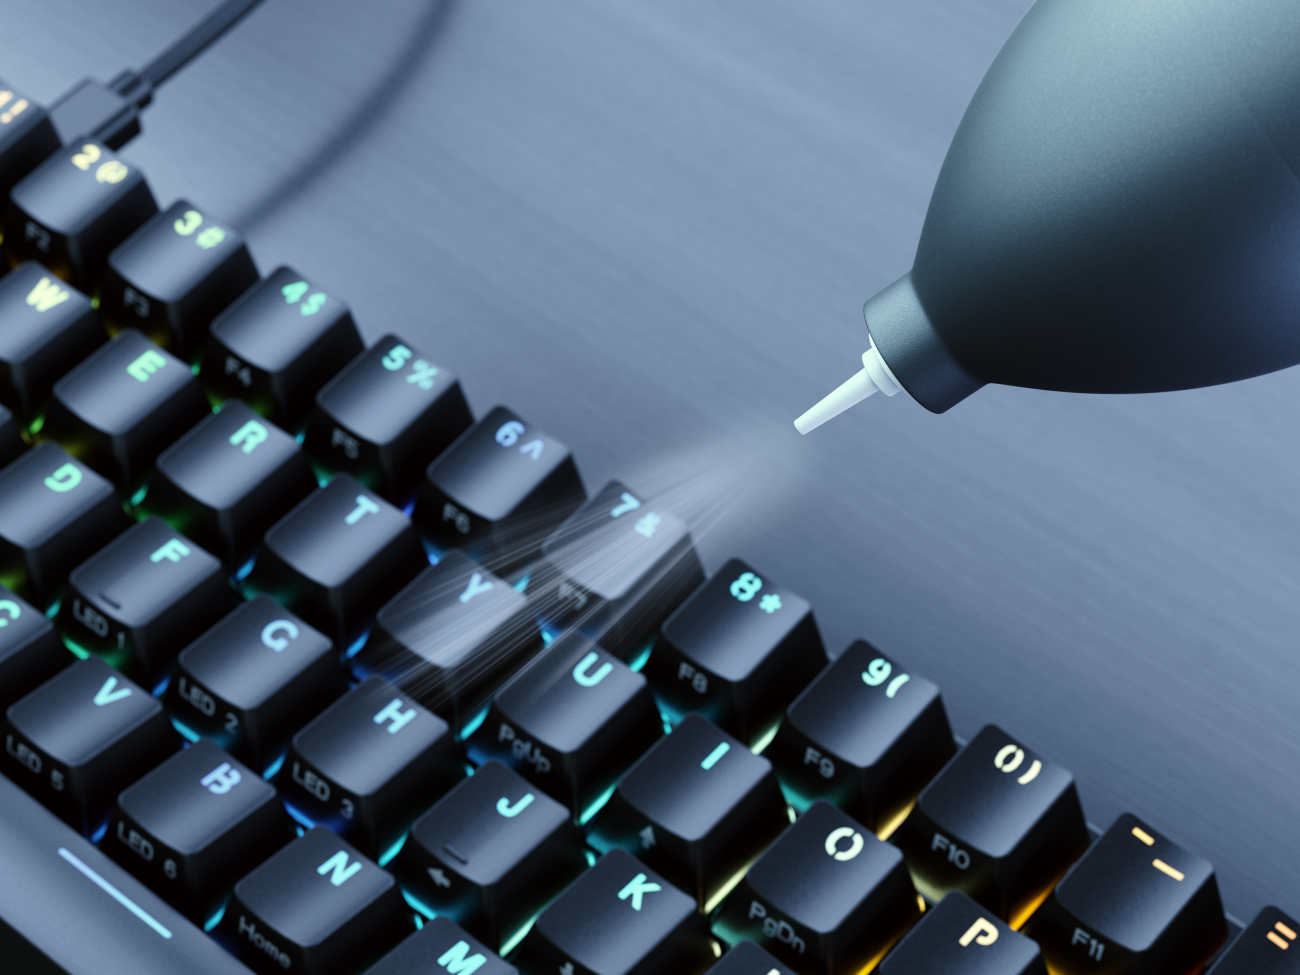
If you choose this way of doing things, you will need a cleaning kit. We recommend our Glorious Keyboard Cleaning Kit, which has everything you need to give your build a good polish. It includes a power blower, an ergonomic thistle brush, and a microfiber cloth.
Begin by using the power blower to blow out any dirt and grime from below the keycap. We recommend starting from the top left corner, and making your way left. When you get to the end of the row, repeat the process on the second line.
Remove uplifted dirt with the fiber cloth.
Then, use the brush to sweep out any dirt from the crevices and the fiber cloth to wipe everything off.
The biggest benefit of having the Glorious Cleaning Kit is that it makes routine cleaning very simple. You can have a spotless setup in minutes, making it a convenient choice for cleaning your keyboard.
If you don't have a cleaning kit, you can also use a soft-bristled brush and a microfiber cloth. Be sure to avoid using any cleaning agents that contain alcohol, as it can damage the material.
Method 2: How to Deep Clean Your Keyboard
This method is much more comprehensive for a deeper clean.
For this method, you will need:
• A bowl with soapy warm water
• A hand towel
• A microfiber cloth
• A secure space, such as a bowl or Ziploc bag, to prevent losing keycaps and switches
• Optionally, the Glorious Cleaning Kit if you want to blow out and brush off dust from within the pin sockets and mechanical switches
Start by carefully removing the switches and keycaps (video guide below) with the removal tools. Then, place the keycaps in the soapy warm water for 5–10 minutes. While the keycaps soak, gently brush off any grime from the board with the microfiber cloth.
NOTE: Keep the bowl of water on a different flat surface, away from the keyboard. In case of an accidental spill, you do not want to get your board wet.
For the deepest clean possible, use the power blower to blow out any dust or grime from the keyboard's pin sockets and from the bottom of the switches. Then, use the brush to help sweep the dirt out, and the microfiber cloth to wipe everything away effectively.
Once the keycaps have soaked, remove them from the soapy water, rinse them, and wipe them down to remove excess water and clean any remaining dirt. Place them on the hand towel with the letter side up for at least 6 hours, so they can air dry.
NOTE: It's important to let your keycaps fully air dry after cleaning. If you don't allow them to dry completely before reattaching, the remaining moisture can potentially damage your keyboard's switches.
How to Remove Keycaps with Puller Tool
A handy visual guide to removing keycaps from your mechanical keyboard.
Safely and efficiently remove keycaps with the Glorious Keycap Puller. The puller’s gold-plated wire reduces the potential for unsightly scratches on your caps, and its uniquely designed, ergonomic handle makes for a hassle-free removal process.
How to Safely Remove Switches
A useful guide to safely removing switches from your modular mechanical keyboard’s hot-swap PCB. Be gentle when removing and reinstalling switches to not damage their connector pins or the board itself.
The Glorious Switch Puller efficiently removes mechanical switches from your board using strong, stainless steel arms. These longer arms provide ample room for you to grip, making the switch puller comfortable even during extended modding sessions.
The puller’s prongs, or 'teeth,' firmly grip the switch’s housing to ensure a smooth removal. This gives the user peace of mind that their switches and the PCB will not be bent or damaged during the removal process.
Some Other Helpful Tips to Keep in Mind
First, and probably the most important, be patient - slow and steady wins the race. Cleaning your keyboard and keycaps thoroughly can take some time, but it's well worth it.
Take a before and after picture to see the difference after a good cleaning session. This can be useful to see how much dirt and grime you removed, and can be a great motivator for cleaning your keyboard regularly!
Clean your board at least every 6 months, or more frequently if you notice that it's getting dirty faster than usual. The more, the merrier. Your mother would be so proud! Pro-tip: Get the Glorious Cleaning Kit and speed up the process.
Finally, to keep your board clean, avoid eating near it. Crumbs and spills can quickly accumulate and cause damage to your keyboard.


